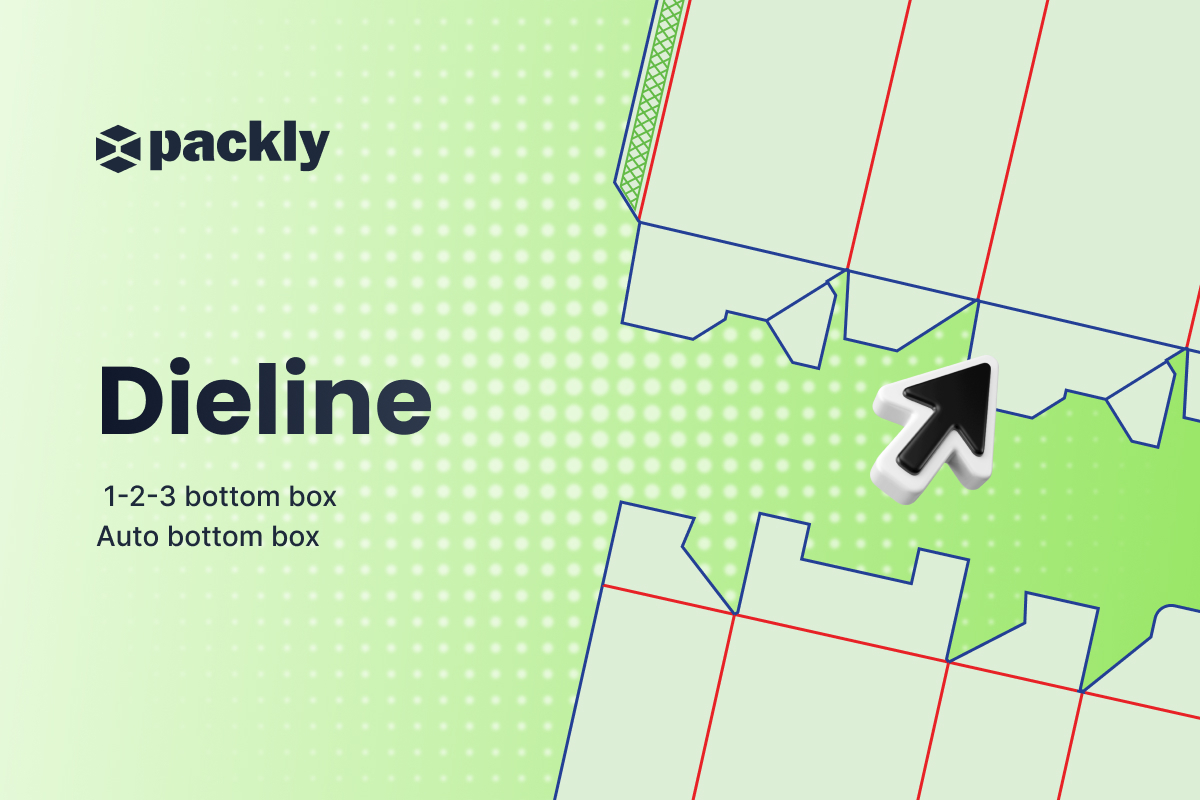
Today’s blog post focuses on some of the technical specifications of the dieline of two packaging models: the 1-2-3 bottom box and the Auto bottom box.

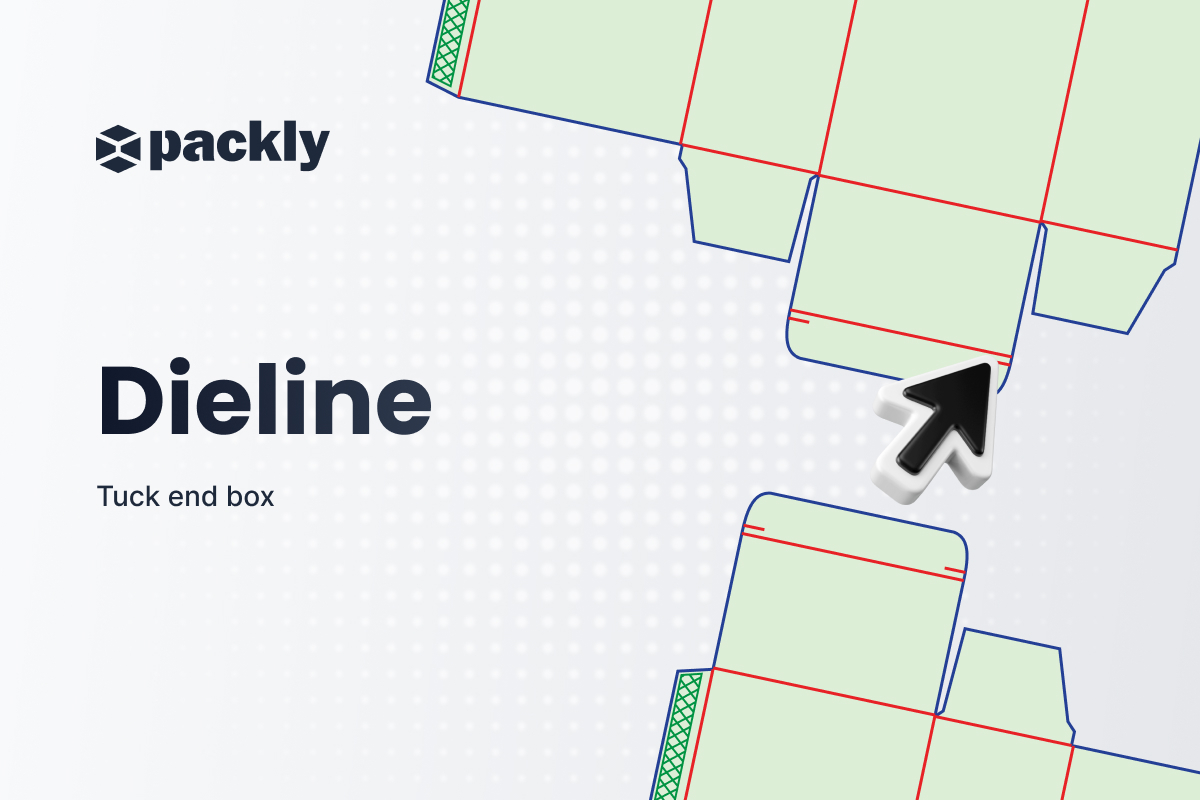
These two types of packaging differ only in the lower closing system, while the upper part of both boxes features a closure system with inner flaps, a locking tab, and safety hooks. Their central structure also retains the characteristics of the straight tuck end box, including the thickness compensations required by the material.
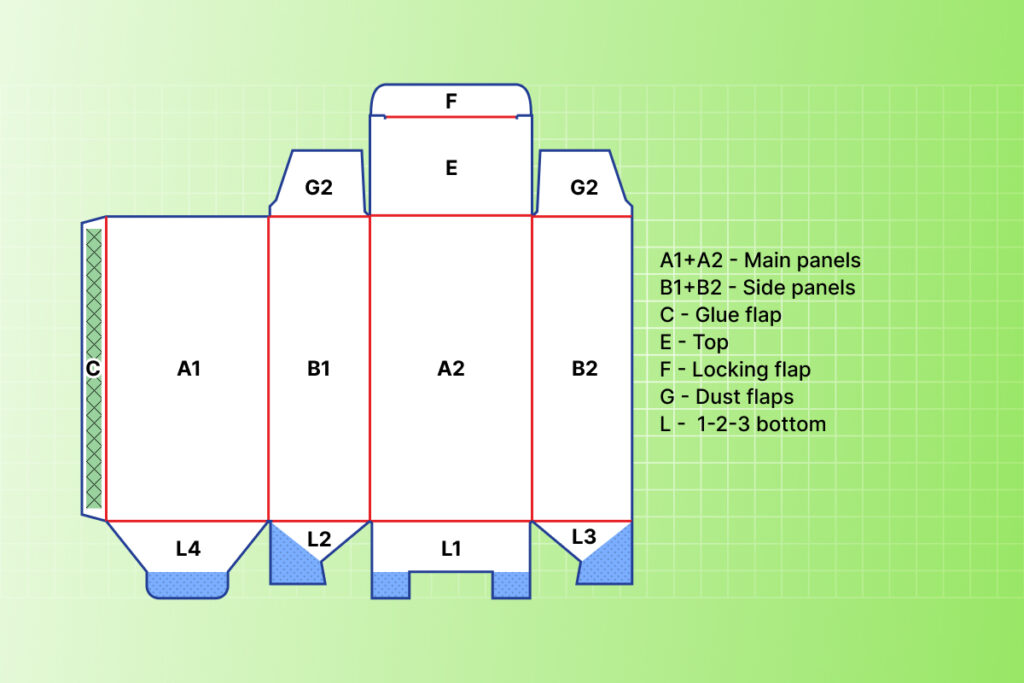
The panels A1 and A2 are the main panels of the box, corresponding to the back and front; B1 and B2 are the side panels, while the letter E represents the top, closed through the locking flap F.
C indicates the glue flap, and the blue texture highlights the area where the glue will be applied. This area should generally not contain printed elements. The bottom components are identified by the letter L, and their numbering indicates the closing sequence required to interlock and close the box. The cyan dotted texture marks the parts that, once the bottom is closed, will not be visible from the outside and therefore should not contain important graphic elements that need to remain visible. The letter G indicates the inner flaps of the box.
The orientation of the letters positioned on the different parts of the packaging is only a graphic guideline suggesting the correct orientation of the artwork according to standard conventions; it does not necessarily have to be followed.
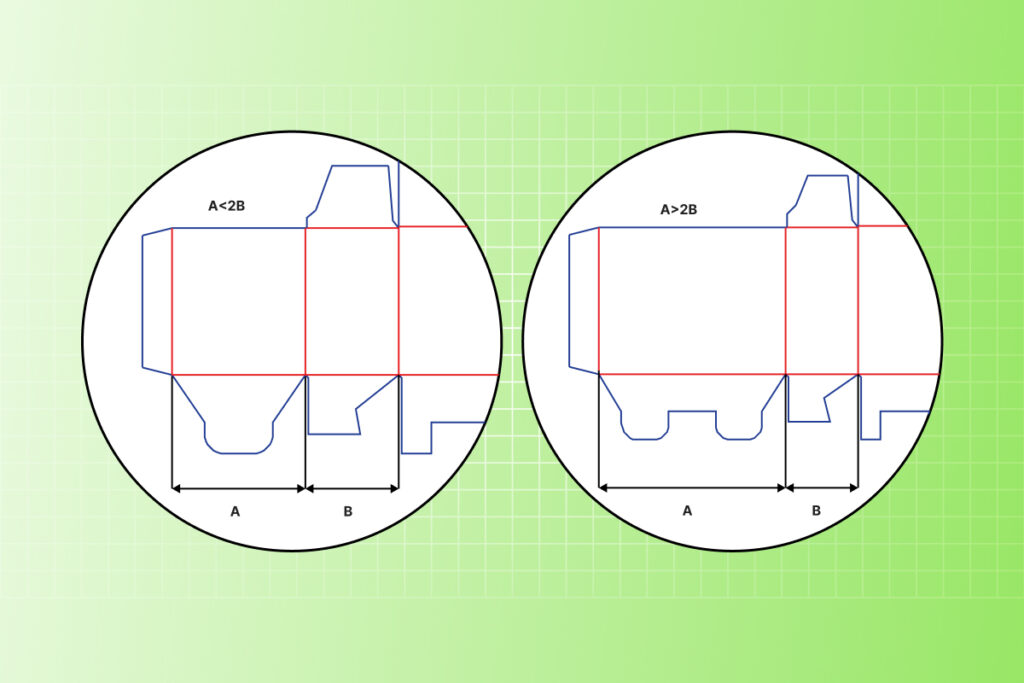
The 1-2-3 bottom (snap-lock bottom) is composed of a series of appropriately shaped flaps that, once folded and interlocked, form the bottom of the box. Depending on the packaging dimensions, and particularly when its width exceeds twice its depth, the bottom is reinforced by adding an additional central flap. This type of closure is mainly used to ensure good structural stability; however, its use is not recommended for products with excessive weight.

The components of the Auto bottom box differ from those of the 1-2-3 bottom box in the lower section: the automatic bottom is indicated by the letter M. In this case, the blue texture highlights the parts that will be glued together and therefore will not be visible; these areas should not be printed to ensure better glue adhesion.
The Auto bottom is characterized by the presence of two glue points that determine its functionality: when the box is opened, these allow the bottom to close automatically through a slight rotation. The glued structure also provides greater resistance, making this solution particularly suitable for containing heavy products.
The dieline of the Auto bottom box is designed to meet all the technical and functional requirements for proper box closure. It includes openings and cut-outs specifically designed to prevent tearing at the junction points between cut and crease lines; a misalignment of the closing flaps equal to the thickness of the material; and an angled cut in the lower part of the glue flap, matching the angle of the opposite flap. Each design choice is therefore driven by precise structural requirements.
To better understand the differences between these two bottom structures and to get useful tips on their use, take a look at our two videos.